How to Install Keen in Cline
What You’ll Need
Before you dive in, make sure you’re on Visual Studio Code with the Cline extension installed, have either Node.js (with npm) or Docker available for running the MCP server, and have your Keen API key at hand (Get it here).
Open MCP Servers
- Click the Cline icon on the left sidebar.
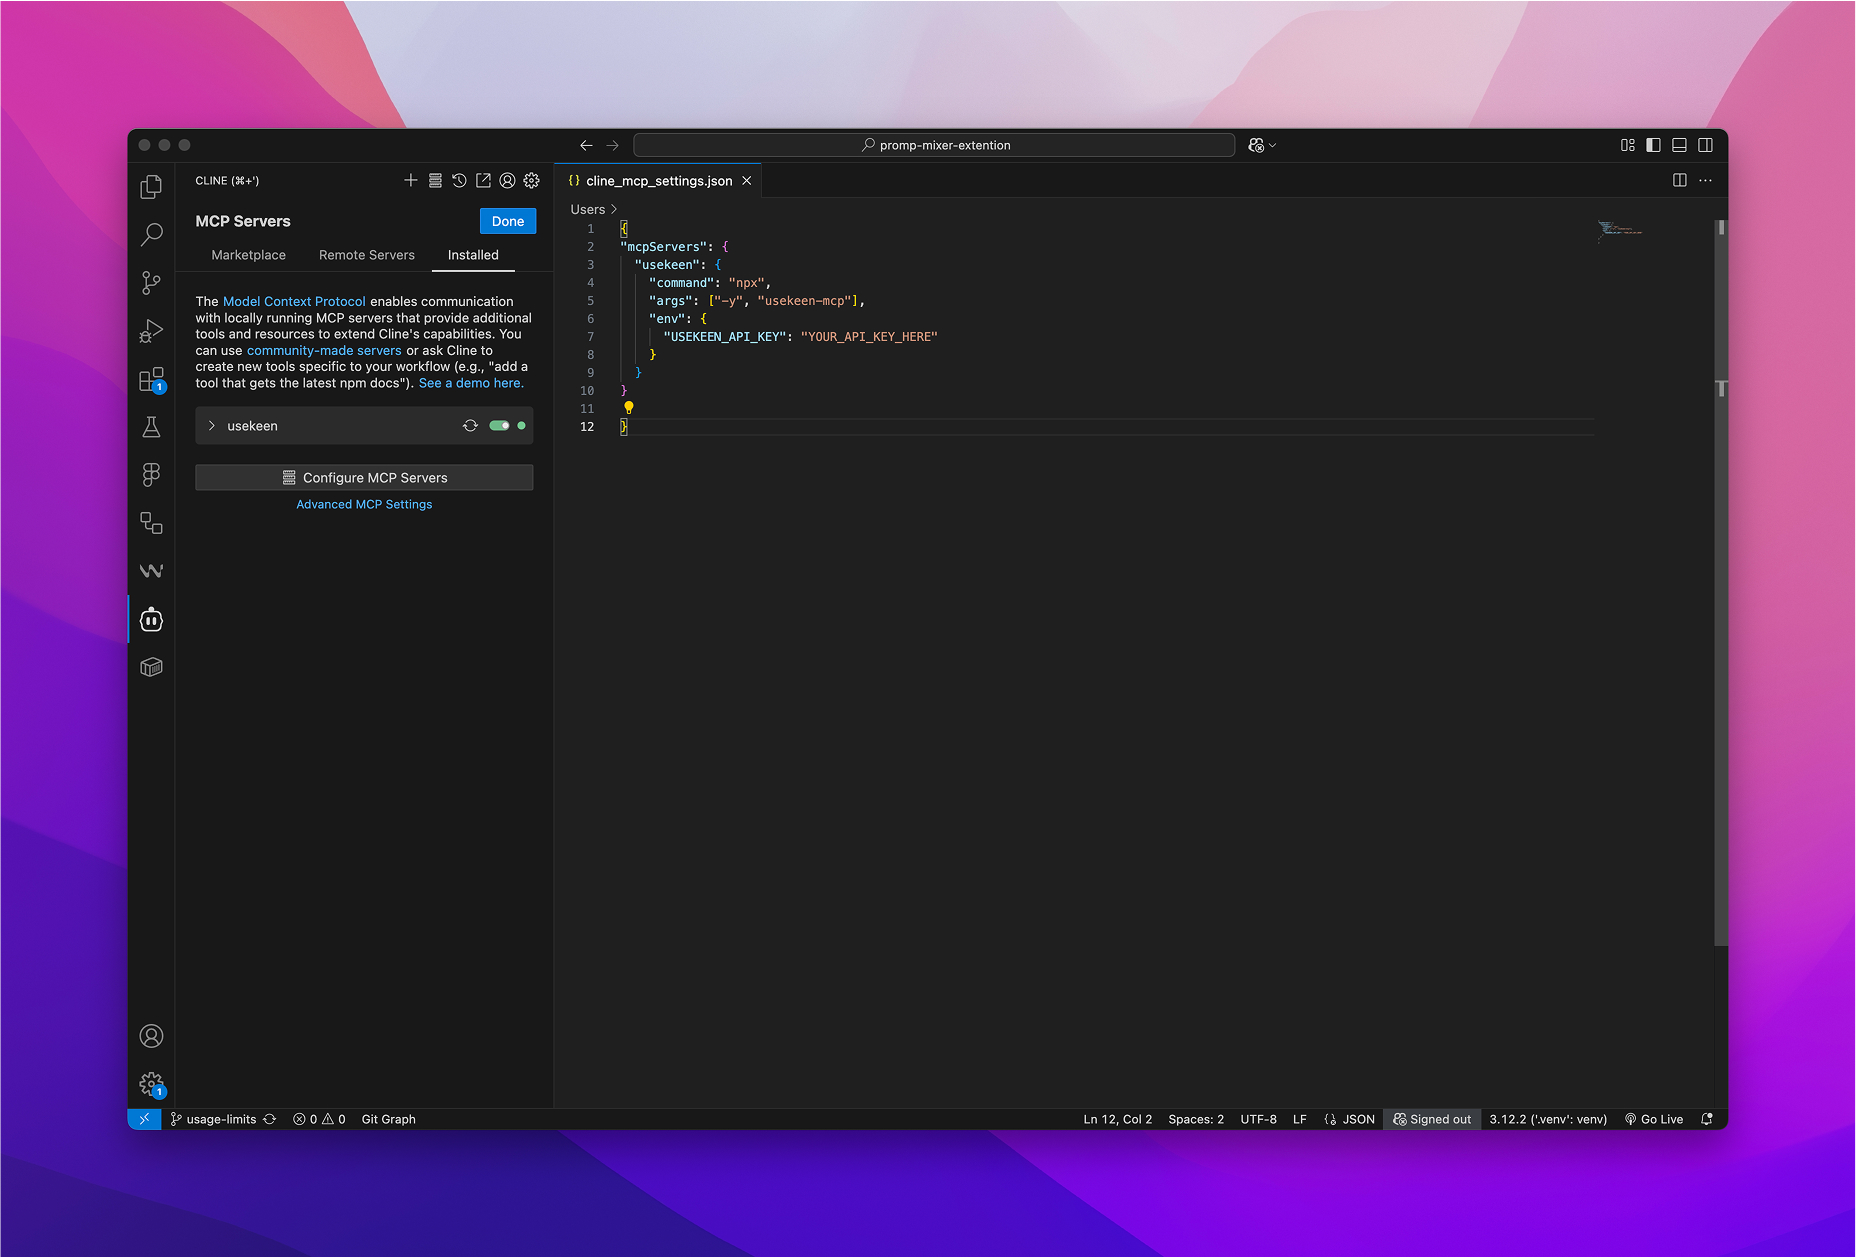
- Click MCP Servers.

Go to Installed → Configure
- In the MCP Servers panel, switch to the Installed tab.
- Click Configure MCP Servers.

Paste the Keen Block
When the JSON settings file opens:
Paste inside the outer (at the top or bottom)
Replace "YOUR_API_KEY_HERE" with your actual key.
Save the file.
{
  "mcpServers": {
    "usekeen": {
      "command": "npx",
      "args": ["-y", "usekeen-mcp"],
      "env": {
        "USEKEEN_API_KEY": "Add your API key here"
      }
    }
  }
}
Confirm It’s Running
- Look for a “Running” badge or green dot next to usekeen.
- If you don’t see it, hit Restart or reload the VS Code window.

And that’s it! You’ve just hooked UseKeen into Cline — no more jumping between tabs to grab the latest docs. If you ever hit a snag, double-check that the usekeen server is toggled on and that your API key is entered correctly. Happy coding!